0. 准备工作
- 操作系统: Ubuntu 18.04
1. 简介
1.1 什么是 Hexo ?
- Hexo 是一个快速、简洁且高效的博客框架。Hexo 使用 Markdown(或其他渲染引擎)解析文章,在几秒内,即可利用靓丽的主题生成静态网页。
官方网站:https://hexo.io/zh-cn/
1.2 什么是 GitHub Pages?
- GitHub 是一个基于 git 的代码托管平台。从开源到商业,可以托管代码、查看代码、管理项目、与其他开发人员一起构建软件。
官方网站:https://github.com/ - GitHub Pages 本身设计用于托管 GitHub 仓库中的个人、组织或项目的页面。我们可以利用它来存放我们的个人博客。
一句话,利用 Hexo 生成静态网页,托管到 GitHub 上,通过 GitHub Pages 查看。
2. 安装 Hexo
官方安装教程:https://hexo.io/zh-cn/docs/
安装 Hexo 之前需要先安装 Node.js 和 Git;
如果电脑中已经安装上述程序,直接查看 2.3 安装Hexo。
2.1 安装 Node.js
输入如下命令,安装 nvm :
1
$ curl https://raw.github.com/creationix/nvm/master/install.sh | sh
如果使用的 shell 不是 sh,要修改最后一个单词。
可通过如下命令查看当前使用的 shell,如下是 zsh。1
2
3
4
5
6
7$ chsh
密码:
正在更改 jiang 的 shell
请输入新值,或直接敲回车键以使用默认值
登录 Shell [/usr/bin/zsh]:
$在 zsh 下安装 nvm,输入如下命令:
1
$ curl https://raw.github.com/creationix/nvm/master/install.sh | zsh
大部分电脑默认的 shell 是 bash,使用如下命令:
1
$ curl https://raw.github.com/creationix/nvm/master/install.sh | bash
nvm 安装完成后,重启终端,输入命令
nvm install stable,安装 Node.js;1
2
3
4
5
6
7
8
9$ nvm install stable
Downloading and installing node v10.3.0...
Downloading https://nodejs.org/dist/v10.3.0/node-v10.3.0-linux-x64.tar.xz...
######################################################################### 100.0%
Computing checksum with sha256sum
Checksums matched!
Now using node v10.3.0 (npm v6.1.0)
Creating default alias: default -> stable (-> v10.3.0)
$
2.2 安装 Git
- 输入命令
sudo apt-get install git,安装 git
2.3 安装 Hexo
输入命令
npm install -g hexo-cli,安装 Hexo1
2
3
4
5
6
7
8$ npm install -g hexo-cli
/home/jiang/.nvm/versions/node/v10.3.0/bin/hexo -> /home/jiang/.nvm/versions/node/v10.3.0/lib/node_modules/hexo-cli/bin/hexo
npm WARN optional SKIPPING OPTIONAL DEPENDENCY: fsevents@1.2.4 (node_modules/hexo-cli/node_modules/fsevents):
npm WARN notsup SKIPPING OPTIONAL DEPENDENCY: Unsupported platform for fsevents@1.2.4: wanted {"os":"darwin","arch":"any"} (current: {"os":"linux","arch":"x64"})
+ hexo-cli@1.1.0
added 103 packages from 343 contributors in 14.452s
$重启终端,输入命令
hexo version,能查看到版本号说明安装成功1
2
3
4
5
6
7
8
9
10
11
12
13
14
15
16
17
18
19$ hexo version
hexo-cli: 1.1.0
os: Linux 4.15.0-22-generic linux x64
http_parser: 2.8.0
node: 10.3.0
v8: 6.6.346.32-node.9
uv: 1.20.3
zlib: 1.2.11
ares: 1.14.0
modules: 64
nghttp2: 1.29.0
napi: 3
openssl: 1.1.0h
icu: 61.1
unicode: 10.0
cldr: 33.0
tz: 2018c
$
3. Hexo 本地建站
官方建站教程:https://hexo.io/zh-cn/docs/setup.html
3.1 初始化
输入命令 hexo init <folder>,创建一个新文件夹,”\<folder>“是文件夹的名称;
输入命令 cd <folder>,打开文件夹;
输入命令 npm install;1
2
3
4
5
6
7
8
9
10
11
12
13
14
15
16
17
18
19
20
21
22
23
24
25
26
27
28
29
30
31
32
33
34
35
36
37
38$ hexo init hexo_test
INFO Cloning hexo-starter to ~/hexo_test
正克隆到 '/home/jiang/hexo_test'...
remote: Counting objects: 65, done.
remote: Total 65 (delta 0), reused 0 (delta 0), ack-reused 65
展开对象中: 100% (65/65), 完成.
子模组 'themes/landscape'(https://github.com/hexojs/hexo-theme-landscape.git)未对路径 'themes/landscape' 注册
正克隆到 '/home/jiang/hexo_test/themes/landscape'...
remote: Counting objects: 819, done.
remote: Total 819 (delta 0), reused 0 (delta 0), pack-reused 819
接收对象中: 100% (819/819), 2.54 MiB | 87.00 KiB/s, 完成.
处理 delta 中: 100% (432/432), 完成.
子模组路径 'themes/landscape':检出 '73a23c51f8487cfcd7c6deec96ccc7543960d350'
INFO Install dependencies
npm WARN deprecated titlecase@1.1.2: no longer maintained
> nunjucks@3.1.3 postinstall /home/jiang/hexo_test/node_modules/nunjucks
> node postinstall-build.js src
npm notice created a lockfile as package-lock.json. You should commit this file.
npm WARN optional SKIPPING OPTIONAL DEPENDENCY: fsevents@1.2.4 (node_modules/fsevents):
npm WARN notsup SKIPPING OPTIONAL DEPENDENCY: Unsupported platform for fsevents@1.2.4: wanted {"os":"darwin","arch":"any"} (current: {"os":"linux","arch":"x64"})
added 400 packages from 487 contributors and audited 2028 packages in 18.795s
found 0 vulnerabilities
INFO Start blogging with Hexo!
$
$ cd hexo_test
$ npm install
npm WARN optional SKIPPING OPTIONAL DEPENDENCY: fsevents@1.2.4 (node_modules/fsevents):
npm WARN notsup SKIPPING OPTIONAL DEPENDENCY: Unsupported platform for fsevents@1.2.4: wanted {"os":"darwin","arch":"any"} (current: {"os":"linux","arch":"x64"})
audited 2028 packages in 3.697s
found 0 vulnerabilities
$
3.2 目录结构
完成新建后,新文件夹目录结构如下:1
2
3
4
5
6
7
8
9$ tree -L 1
.
├── _config.yml
├── node_modules
├── package.json
├── package-lock.json
├── scaffolds
├── source
└── themes
3.3 生成静态页面
输入命令 hexo g 或 hexo generate 生成静态文件;1
2
3
4
5
6
7
8
9
10
11
12
13
14
15
16
17
18
19
20
21
22
23
24
25
26
27
28
29
30
31
32
33
34$ hexo g
INFO Start processing
INFO Files loaded in 244 ms
INFO Generated: index.html
INFO Generated: archives/index.html
INFO Generated: fancybox/blank.gif
INFO Generated: fancybox/jquery.fancybox.css
INFO Generated: fancybox/fancybox_loading.gif
INFO Generated: fancybox/fancybox_loading@2x.gif
INFO Generated: fancybox/fancybox_overlay.png
INFO Generated: fancybox/fancybox_sprite.png
INFO Generated: fancybox/fancybox_sprite@2x.png
INFO Generated: archives/2018/05/index.html
INFO Generated: archives/2018/index.html
INFO Generated: css/fonts/FontAwesome.otf
INFO Generated: js/script.js
INFO Generated: fancybox/helpers/jquery.fancybox-buttons.css
INFO Generated: fancybox/jquery.fancybox.pack.js
INFO Generated: fancybox/helpers/jquery.fancybox-buttons.js
INFO Generated: fancybox/helpers/jquery.fancybox-media.js
INFO Generated: fancybox/helpers/jquery.fancybox-thumbs.css
INFO Generated: fancybox/helpers/jquery.fancybox-thumbs.js
INFO Generated: css/style.css
INFO Generated: fancybox/helpers/fancybox_buttons.png
INFO Generated: css/fonts/fontawesome-webfont.woff
INFO Generated: css/fonts/fontawesome-webfont.eot
INFO Generated: css/fonts/fontawesome-webfont.ttf
INFO Generated: css/images/banner.jpg
INFO Generated: css/fonts/fontawesome-webfont.svg
INFO Generated: 2018/05/31/hello-world/index.html
INFO Generated: fancybox/jquery.fancybox.js
INFO 28 files generated in 568 ms
$
3.4 启动本地服务器
输入命令 hexo s 或 hexo server,启动本地服务器;
默认访问网址为:http://localhost:4000/1
2
3$ hexo s
INFO Start processing
INFO Hexo is running at http://localhost:4000/. Press Ctrl+C to stop.
3.5 访问本地服务器
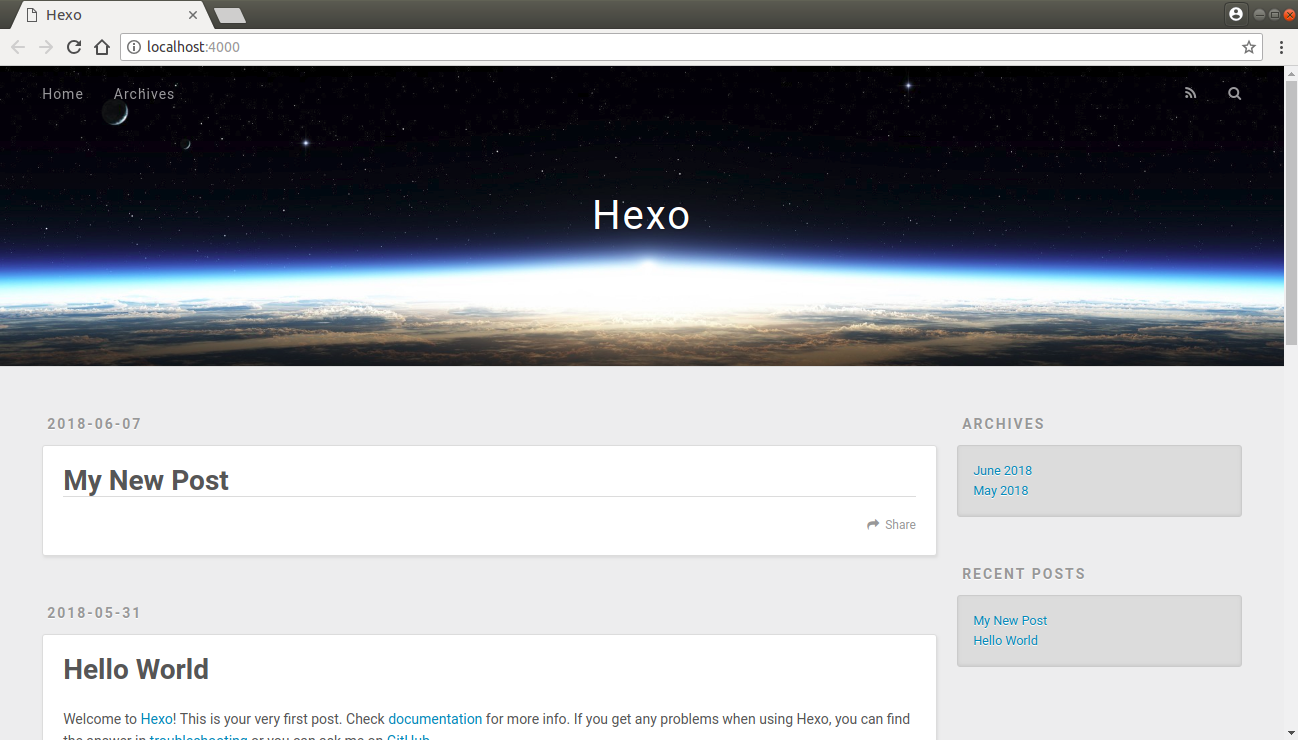
打开浏览器,输入网址 http://localhost:4000/,等待一小会儿,进入 Hexo 界面,如下图: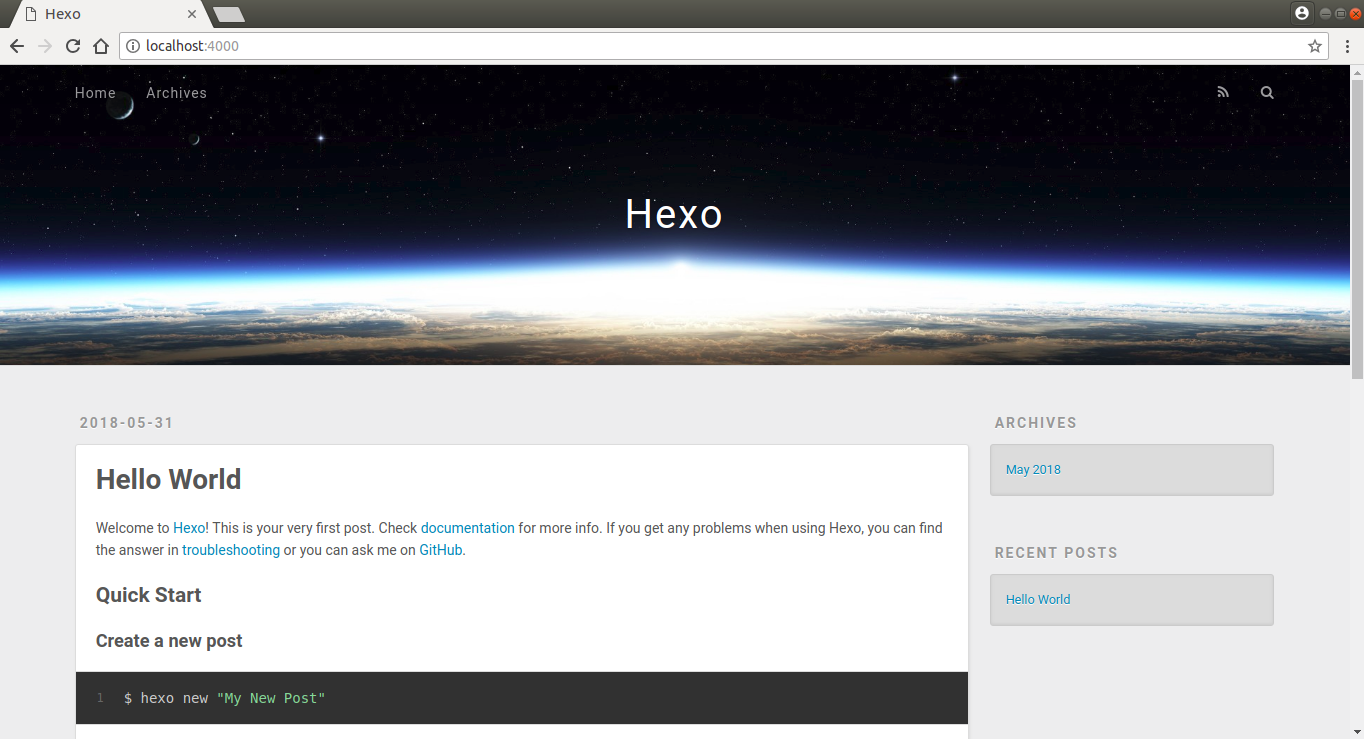
至此,我们有了一个本地的博客。下一步开启 GitHub Pages。
4. 开启 GitHub Pages
4.1 注册 GitHub
参考如下教程,完成GitHub的注册和仓库的建立
GitHub 的注册与使用
4.2 修改仓库类型为 GitHub Pages
- 在仓库页面点击设置 “Setting“

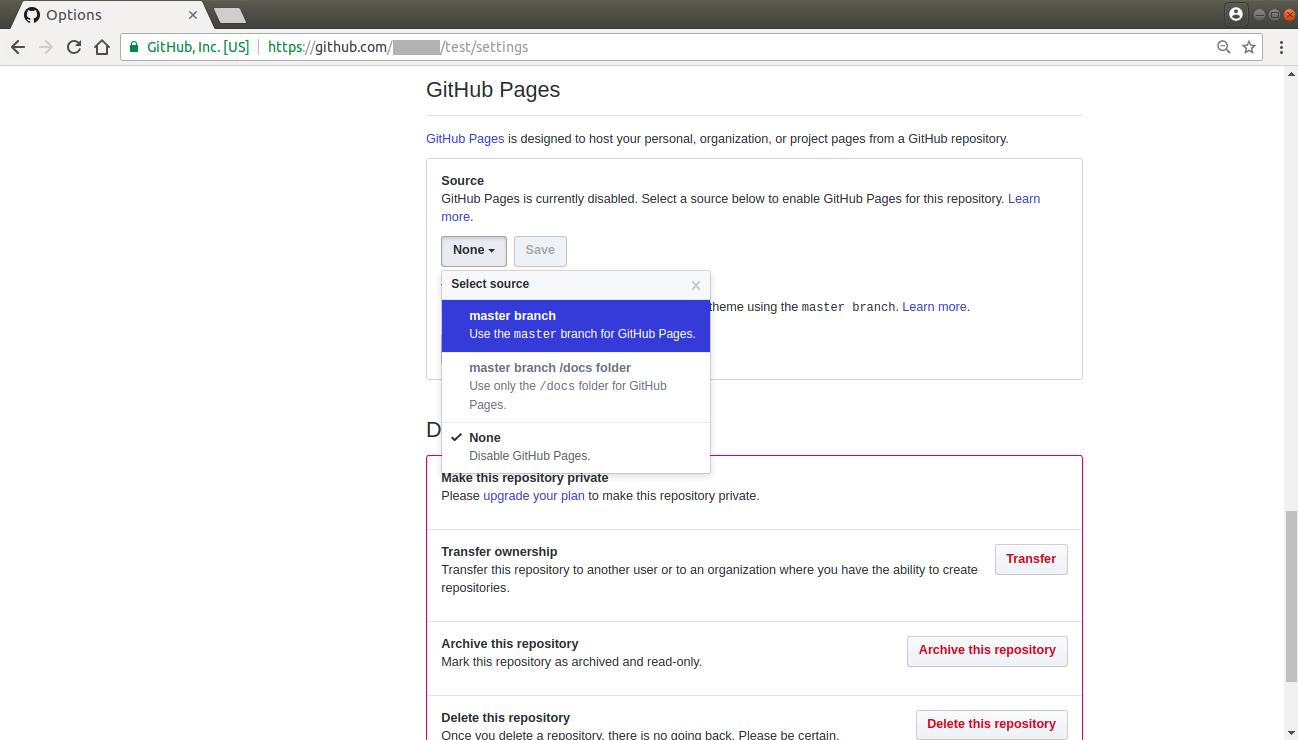
- “Setting“页面如下:

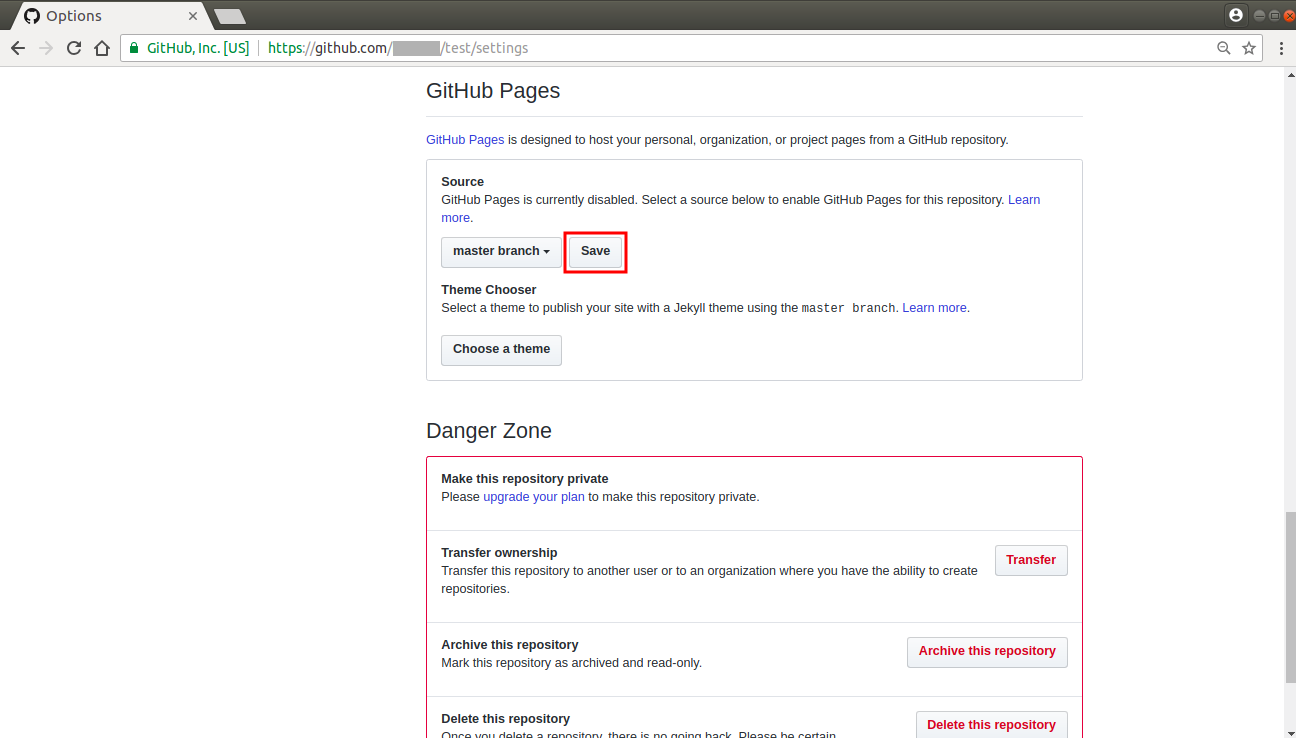
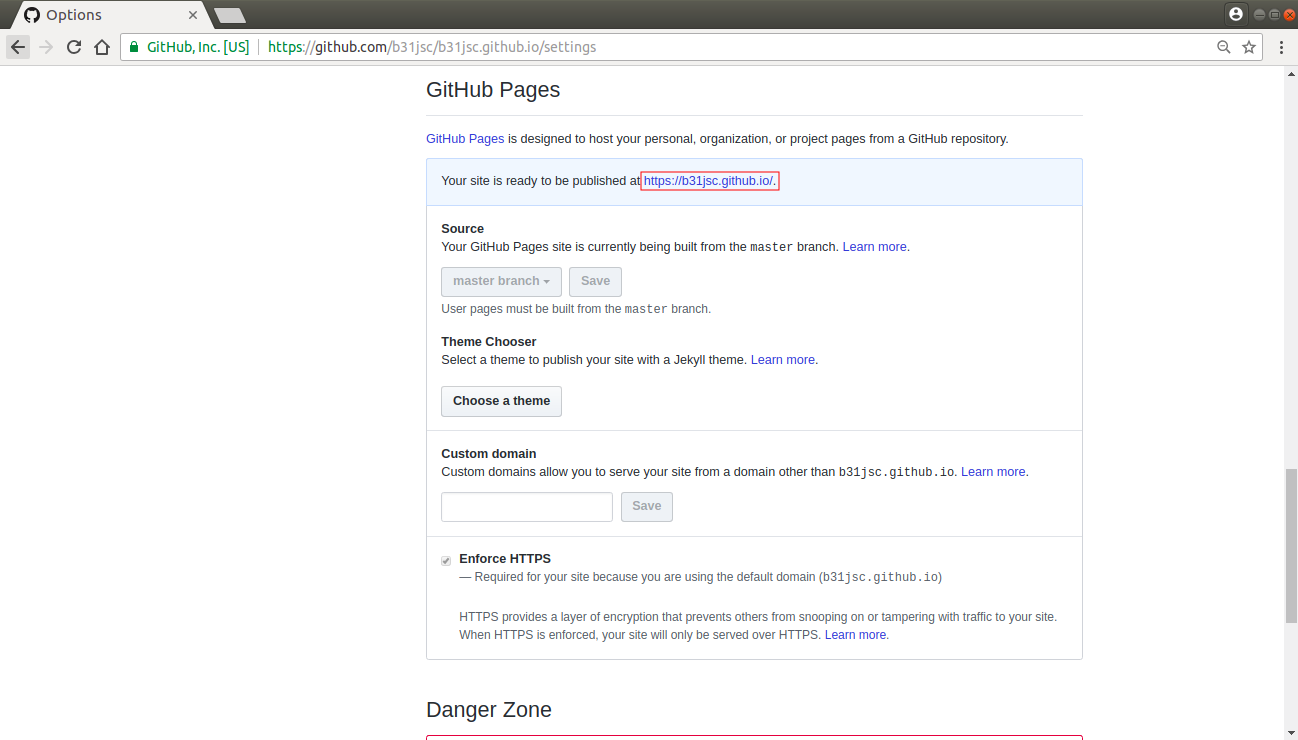
- 下拉 “Setting“ 页面到 “GitHub Pages“ 处,选择 “source“ 为 “master branch“
- 点击保存 “save“
- 再次回到 “GitHub Pages“ ,可以看到提示 “Your site is ready to be published at https://b31jsc.github.io/test/“
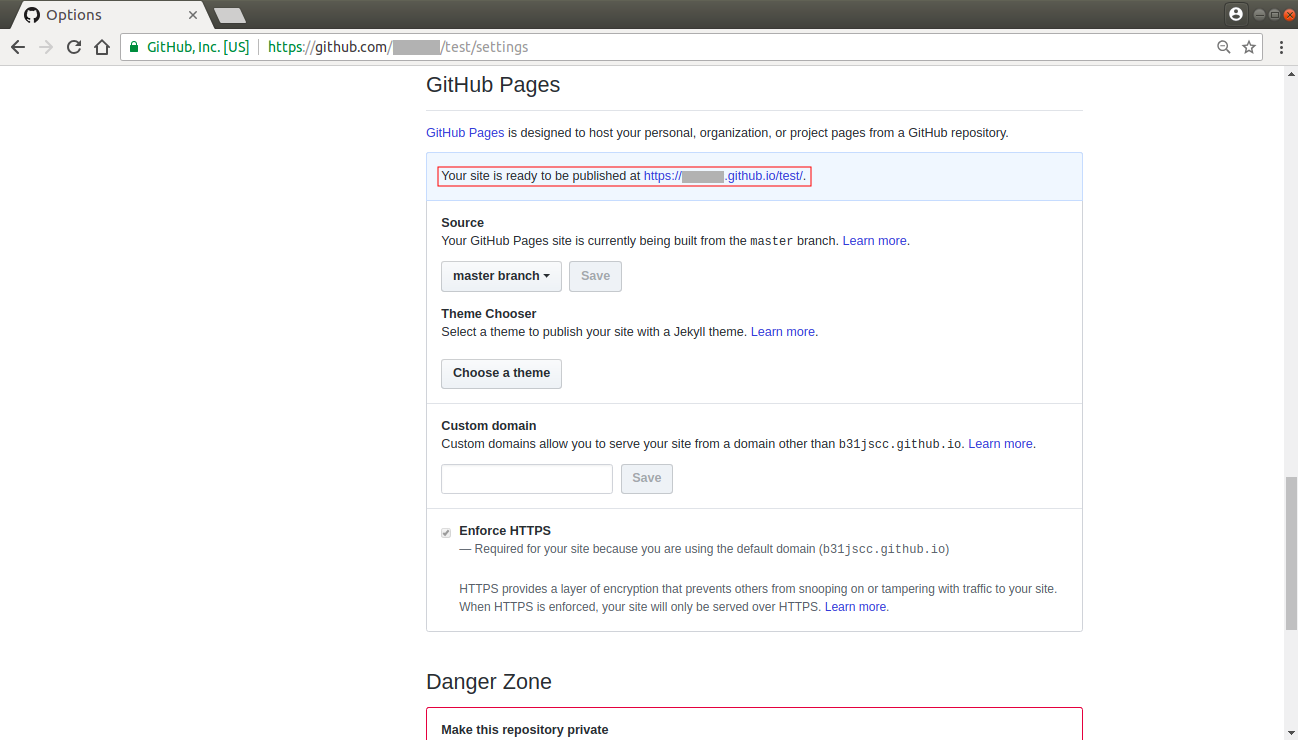
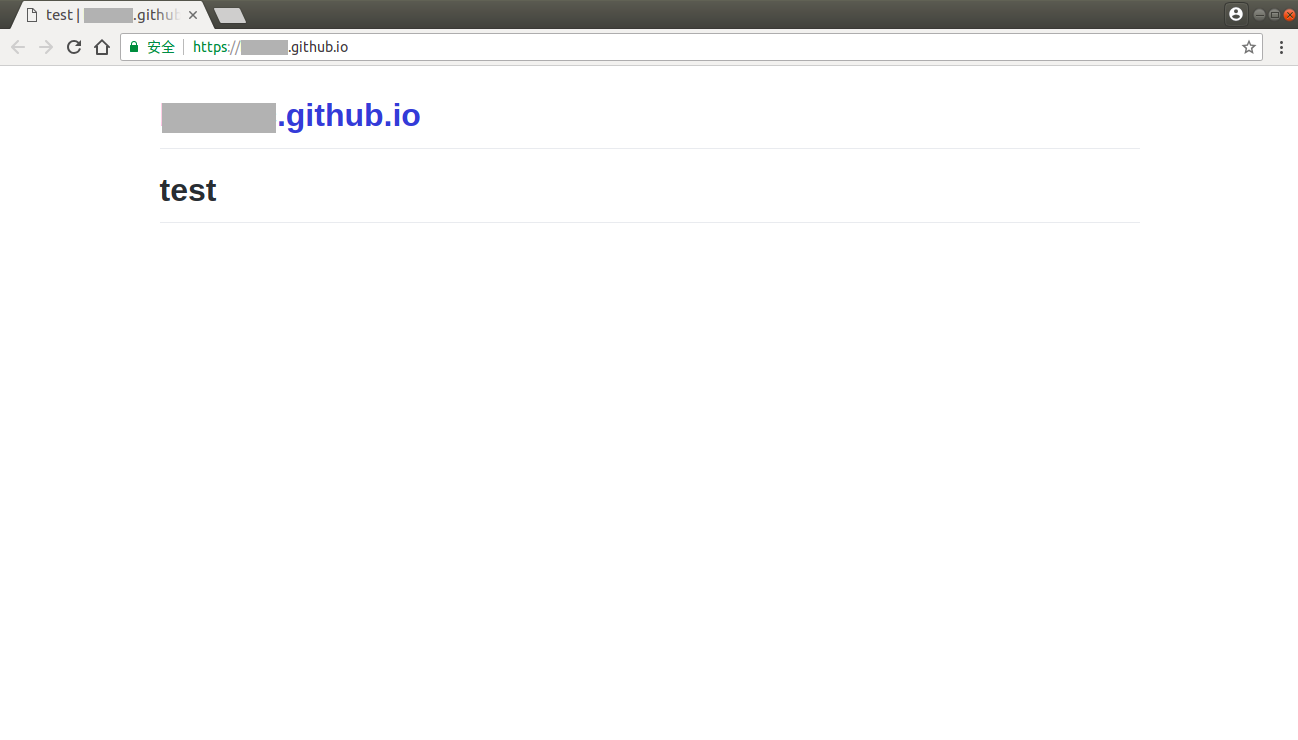
- 打开浏览器,输入网址 https://b31jsc.github.io/test/,可以看到 test 已经建立

4.3 优化 GitHub Pages 域名
- 再次打开 “Setting“,修改 “repository name“为 “b31jsc.github.io”,点击”Rename“。其中 “b31jsc”是账户名称,”.github.io”是后缀,一定要按该格式填写
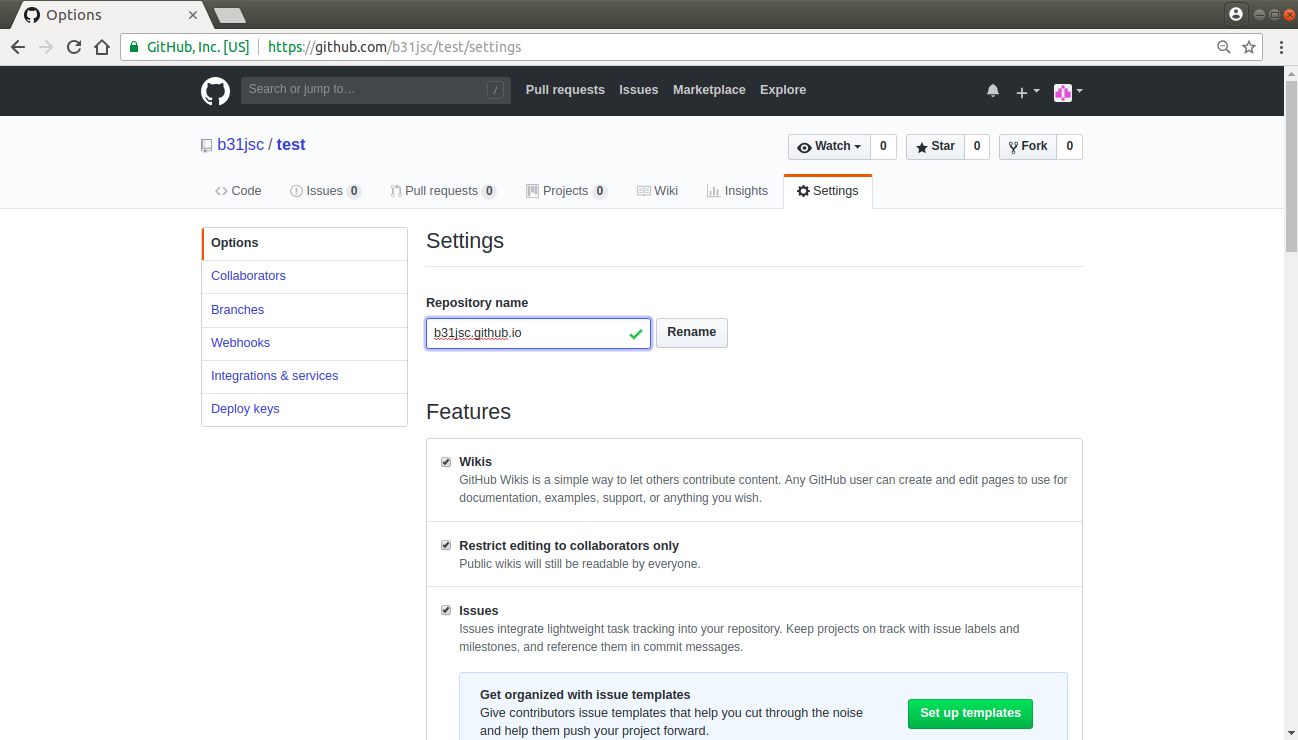
回到 GitHub Pages 处,可以看到提示变为 “Your site is ready to be published at https://b31jsc.github.io/.“
打开浏览器,输入网址 https://b31jsc.github.io/,可以通过新域名访问 GitHub Pages
至此我们已经有了一个 GitHub Pages 网页,接下来将 Hexo 生成的网页发布到 GitHub Pages。
5. 发布到 GitHub
5.1 编辑 _config.yml 文件
打开 3.1 初始化 建立的 Hexo 目录,打开 _config.yml 文件,搜索 “deploy“ 字段,添加 GitHub 仓库地址。
GitHub 仓库地址在此处查看:
修改前:1
2
3
4# Deployment
## Docs: https://hexo.io/docs/deployment.html
deploy:
type:
修改后:1
2
3
4
5# Deployment
## Docs: https://hexo.io/docs/deployment.html
deploy:
type: git
repo: git@github.com:b31jsc/b31jsc.github.io.git
注意 _config.yml 文件中的空格!
5.2 发布到 GitHub
输入命令
npm install hexo-deployer-git --save,安装插件 hexo-deployer-git1
2
3
4
5
6
7
8
9
10$ npm install hexo-deployer-git --save
npm WARN deprecated swig@1.4.2: This package is no longer maintained
npm WARN optional SKIPPING OPTIONAL DEPENDENCY: fsevents@1.2.4 (node_modules/fsevents):
npm WARN notsup SKIPPING OPTIONAL DEPENDENCY: Unsupported platform for fsevents@1.2.4: wanted {"os":"darwin","arch":"any"} (current: {"os":"linux","arch":"x64"})
+ hexo-deployer-git@0.3.1
added 31 packages from 36 contributors and audited 2303 packages in 12.027s
found 1 low severity vulnerability
run `npm audit fix` to fix them, or `npm audit` for details
$报错,按提示输入命令
npm audit fix,再次输入命令npm install hexo-deployer-git --save1
2
3
4
5
6
7
8
9
10
11
12
13
14
15
16
17
18
19
20
21$ npm audit fix
npm WARN optional SKIPPING OPTIONAL DEPENDENCY: fsevents@1.2.4 (node_modules/fsevents):
npm WARN notsup SKIPPING OPTIONAL DEPENDENCY: Unsupported platform for fsevents@1.2.4: wanted {"os":"darwin","arch":"any"} (current: {"os":"linux","arch":"x64"})
up to date in 2.571s
fixed 0 of 1 vulnerability in 2303 scanned packages
1 vulnerability required manual review and could not be updated
$
$ npm install hexo-deployer-git --save
[..................] | fetchMetadata: sill removeObsoleteDep removing wordwrap@
[..................] | fetchMetadata: sill removeObsoleteDep removing wordwrap@
npm WARN deprecated swig@1.4.2: This package is no longer maintained
npm WARN optional SKIPPING OPTIONAL DEPENDENCY: fsevents@1.2.4 (node_modules/fsevents):
npm WARN notsup SKIPPING OPTIONAL DEPENDENCY: Unsupported platform for fsevents@1.2.4: wanted {"os":"darwin","arch":"any"} (current: {"os":"linux","arch":"x64"})
+ hexo-deployer-git@0.3.1
updated 1 package and audited 2303 packages in 289.117s
found 1 low severity vulnerability
run `npm audit fix` to fix them, or `npm audit` for details
$依然报错,经过仔细查看,文件 _config.yml 编辑有误,”repo:“前方应有两个空格,后方应有一个空格。
修改前:1
repo:git@github.com:b31jsc/b31jsc.github.io.git
修改后:
1
repo: git@github.com:b31jsc/b31jsc.github.io.git
再次输入命令
npm install hexo-deployer-git, --save,完成安装1
2
3
4
5
6
7
8$ npm install hexo-deployer-git --save
npm WARN deprecated swig@1.4.2: This package is no longer maintained
npm WARN optional SKIPPING OPTIONAL DEPENDENCY: fsevents@1.2.4 (node_modules/fsevents):
npm WARN notsup SKIPPING OPTIONAL DEPENDENCY: Unsupported platform for fsevents@1.2.4: wanted {"os":"darwin","arch":"any"} (current: {"os":"linux","arch":"x64"})
+ hexo-deployer-git@0.3.1
updated 1 package in 16.862s
$输入命令
hexo deploy,将网页部署到 GitHub,等待命令执行完成1
2
3
4
5
6
7
8
9
10
11
12
13
14
15
16
17
18
19
20
21
22
23
24
25
26
27
28
29
30
31
32
33
34
35
36
37
38
39
40
41
42
43
44
45
46$ hexo deploy
INFO Deploying: git
INFO Setting up Git deployment...
已初始化空的 Git 仓库于 /home/jiang/hexo_test/.deploy_git/.git/
[master (根提交) 7873880] First commit
1 file changed, 0 insertions(+), 0 deletions(-)
create mode 100644 placeholder
INFO Clearing .deploy_git folder...
INFO Copying files from public folder...
INFO Copying files from extend dirs...
[master 331bfa6] Site updated: 2018-06-05 13:55:10
29 files changed, 5777 insertions(+)
create mode 100644 2018/05/31/hello-world/index.html
create mode 100644 archives/2018/05/index.html
create mode 100644 archives/2018/index.html
create mode 100644 archives/index.html
create mode 100644 css/fonts/FontAwesome.otf
create mode 100644 css/fonts/fontawesome-webfont.eot
create mode 100644 css/fonts/fontawesome-webfont.svg
create mode 100644 css/fonts/fontawesome-webfont.ttf
create mode 100644 css/fonts/fontawesome-webfont.woff
create mode 100644 css/images/banner.jpg
create mode 100644 css/style.css
create mode 100644 fancybox/blank.gif
create mode 100644 fancybox/fancybox_loading.gif
create mode 100644 fancybox/fancybox_loading@2x.gif
create mode 100644 fancybox/fancybox_overlay.png
create mode 100644 fancybox/fancybox_sprite.png
create mode 100644 fancybox/fancybox_sprite@2x.png
create mode 100644 fancybox/helpers/fancybox_buttons.png
create mode 100644 fancybox/helpers/jquery.fancybox-buttons.css
create mode 100644 fancybox/helpers/jquery.fancybox-buttons.js
create mode 100644 fancybox/helpers/jquery.fancybox-media.js
create mode 100644 fancybox/helpers/jquery.fancybox-thumbs.css
create mode 100644 fancybox/helpers/jquery.fancybox-thumbs.js
create mode 100644 fancybox/jquery.fancybox.css
create mode 100644 fancybox/jquery.fancybox.js
create mode 100644 fancybox/jquery.fancybox.pack.js
create mode 100644 index.html
create mode 100644 js/script.js
delete mode 100644 placeholder
To github.com:b31jsc/b31jsc.github.io.git
+ 4418259...331bfa6 HEAD -> master (forced update)
分支 'master' 设置为跟踪来自 'git@github.com:b31jsc/b31jsc.github.io.git' 的远程分支 'master'。
INFO Deploy done: git
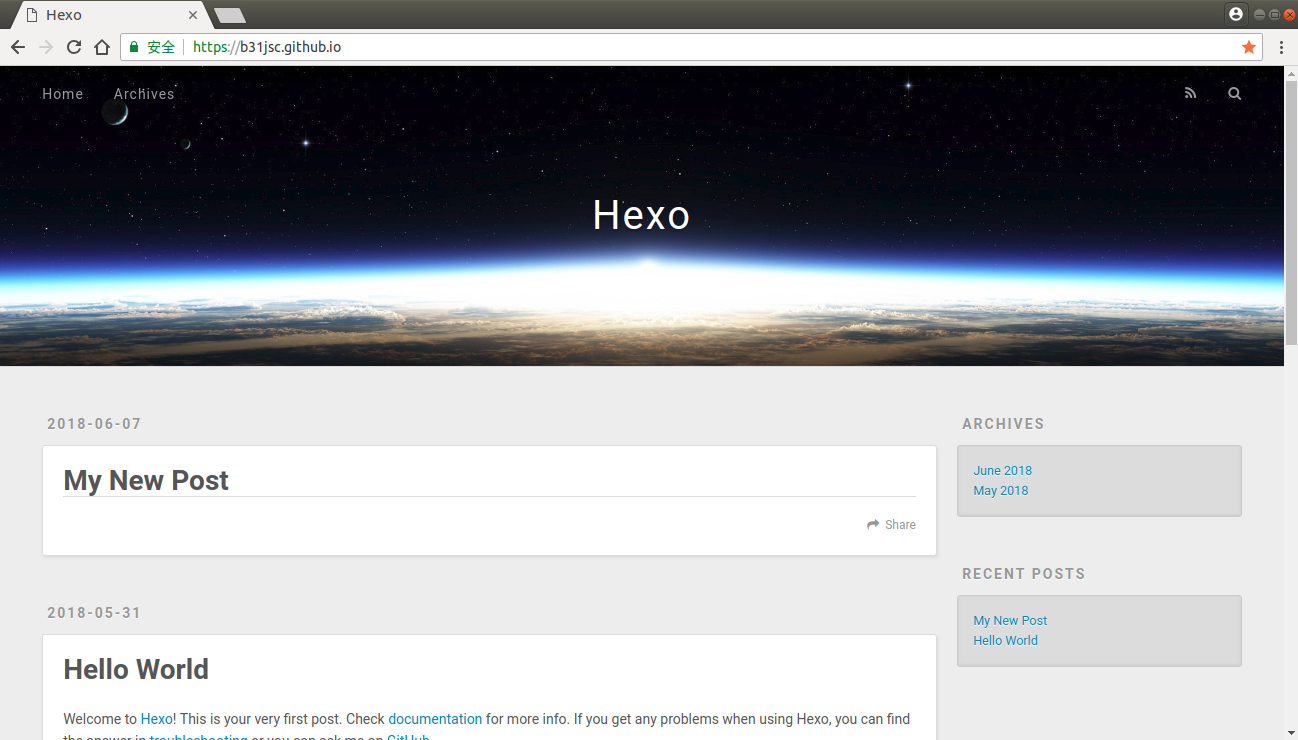
$打开浏览器,输入网址 https://b31jsc.github.io/,可以看到 Hexo 页面已经上传到 Github Pages 了
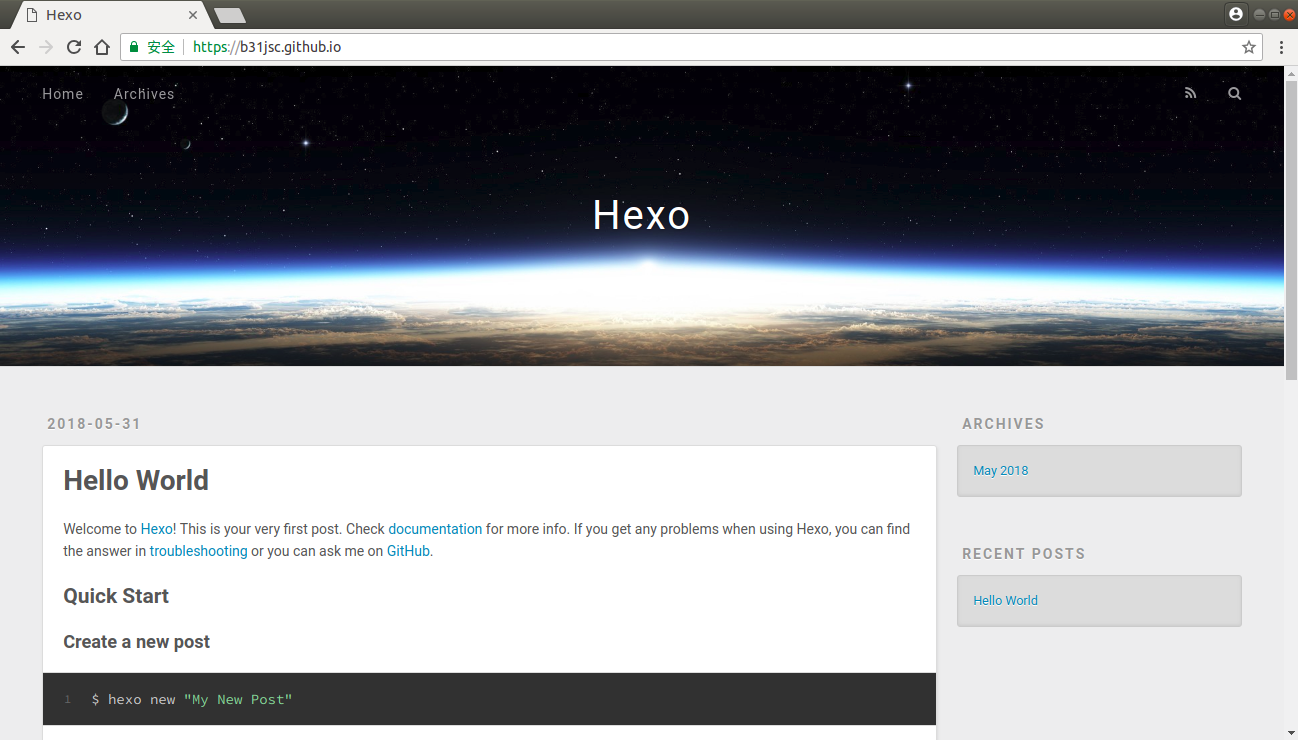
上文我们将模板页面上传到 Github Pages,接下来介绍如何写一篇新博客。
6. 写新博客
回到章节 3. Hexo 本地建站 初始化的文件夹,输入命令
hexo n "My New Post"或者hexo new "My New Post"1
2
3$ hexo new "My New Post"
INFO Created: ~/hexo_test/source/_posts/My-New-Post.md
$该命令在目录
source/_posts/下新建了文件 “My-New-Post.md”,文件内容如下:1
2
3
4
5
6$ cat source/_posts/My-New-Post.md
---
title: My New Post
date: 2018-06-07 15:11:08
tags:
---输入命令
hexo s或者hexo server,启动本地服务器- 打开浏览器,输入网址 http://localhost:4000/,可以看到新文章 “My New Post”
- 输入命令
hexo g或者hexo generate,重新生成本地页面 输入命令
hexo d或者hexo deploy,部署到 GitHub1
2
3
4
5
6
7
8
9
10
11
12
13
14
15
16
17
18
19
20
21
22
23
24
25
26$ hexo g
INFO Start processing
INFO Files loaded in 144 ms
INFO Generated: index.html
INFO Generated: archives/2018/index.html
INFO Generated: archives/index.html
INFO Generated: archives/2018/05/index.html
INFO Generated: 2018/05/31/hello-world/index.html
INFO Generated: archives/2018/06/index.html
INFO Generated: 2018/06/07/My-New-Post/index.html
INFO 7 files generated in 199 ms
$
$ hexo deploy
INFO Deploying: git
INFO Clearing .deploy_git folder...
INFO Copying files from public folder...
INFO Copying files from extend dirs...
[master 0bad987] Site updated: 2018-06-07 15:30:10
7 files changed, 475 insertions(+), 7 deletions(-)
create mode 100644 2018/06/07/My-New-Post/index.html
create mode 100644 archives/2018/06/index.html
To github.com:b31jsc/b31jsc.github.io.git
331bfa6..0bad987 HEAD -> master
分支 'master' 设置为跟踪来自 'git@github.com:b31jsc/b31jsc.github.io.git' 的远程分支 'master'。
INFO Deploy done: git
$打开浏览器,输入网址 https://b31jsc.github.io/,可以看到新文章 “My New Post”。如果打开发现没有变化,稍等片刻,给 GitHub 一个反应的时间,重新打开网页就会看到了
目录 source/_posts/ 下的文件对应每一篇博客,根据自己需要进行修改,修改完成后重新 hexo generate 和 hexo deploy
7. 修改主题
博客页面不想用默认风格,可以换一个风格
官方主题页面:https://hexo.io/themes/
在该页面找一个喜欢的主题,此处以NexT为例
回到 hexo 目录,输入命令
git clone https://github.com/theme-next/hexo-theme-next.git themes/next,下载主题1
2
3
4
5
6
7$ git clone https://github.com/theme-next/hexo-theme-next.git themes/next
正克隆到 'themes/next'...
remote: Counting objects: 3543, done.
remote: Total 3543 (delta 0), reused 0 (delta 0), pack-reused 3542
接收对象中: 100% (3543/3543), 1.24 MiB | 618.00 KiB/s, 完成.
处理 delta 中: 100% (2273/2273), 完成.
$修改_config文件,查找 theme 字段,修改主题为next
修改前:1
2
3
4# Extensions
## Plugins: https://hexo.io/plugins/
## Themes: https://hexo.io/themes/
theme: landscape修改后:
1
2
3
4# Extensions
## Plugins: https://hexo.io/plugins/
## Themes: https://hexo.io/themes/
theme: next输入命令
hexo s或者hexo server,启动本地服务器- 打开浏览器,输入网址 http://localhost:4000/,可以看到界面风格已经变化
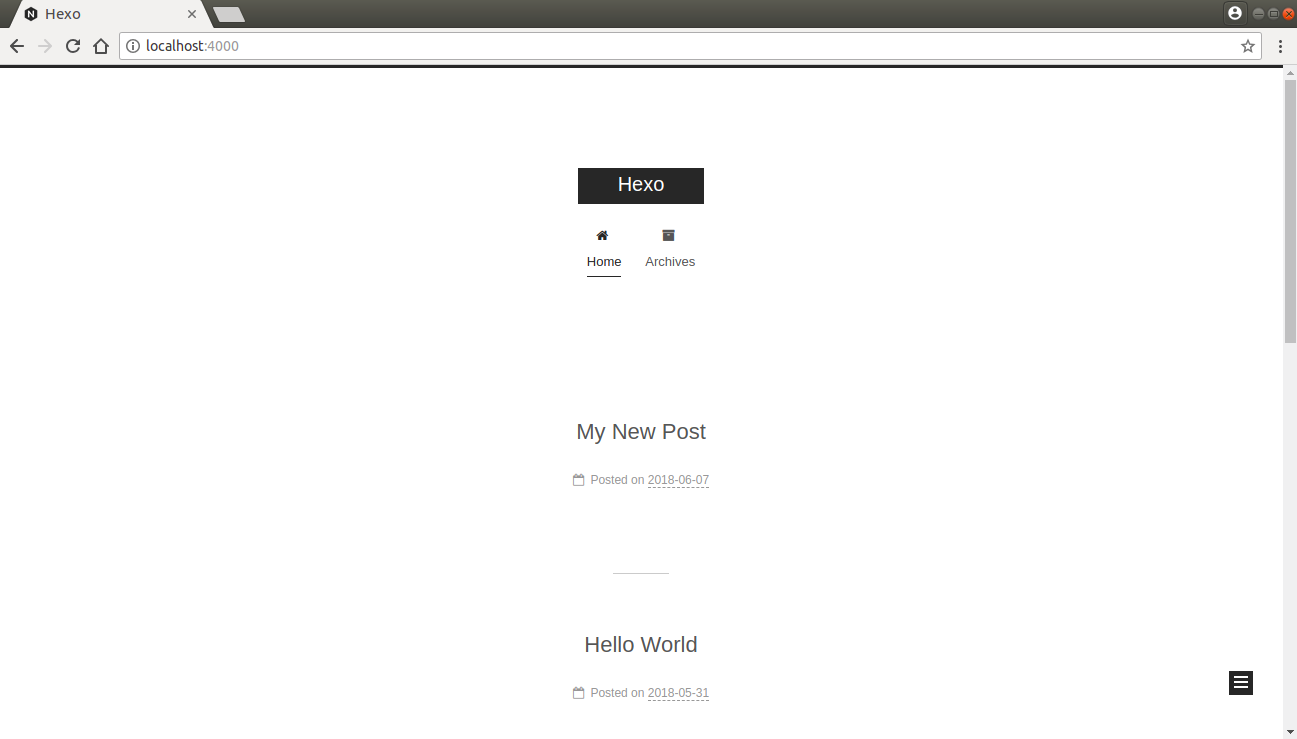
- 生成静态页面,上传GitHub,省略具体步骤
以上,我们已经可以建立自己的博客了。
注意:
- Hexo 只上传了 GitHub 最终生成的网页,GitHub 上并没有保留源码,有源码丢失的风险,可以将源码也保留一份在 GitHub 上
在 GitHub 上新建一个仓库,在 Hexo 目录依次输入如下命令:hexo clean清除多余文件git initgit add *添加所有文件git add .gitignore补充添加.gitignore文件git commit -m "first commit"git remote add origin XXXXXXXXXX是注册仓库的地址git push -u origin master